“Aha! Captured!”
Overview

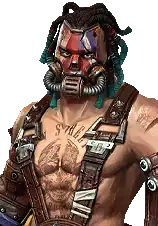
Mira
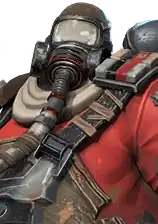
Madam Rus
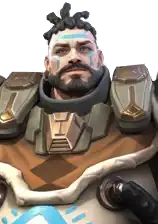
 Minutemen
Advanced Elite
Support
Tank
Minutemen
Advanced Elite
Support
Tank
2: Position 2 lets Mira serve as a front-line support, absorbing some damage to trigger Mirage’s bleeding while staying close to the primary tank for Battlefield Treatment healing.
1: Position 1 maximizes Mirage bleeding procs since Mira takes the most damage, but risks her survivability without strong mitigation or a secondary tank nearby.
5: Position 5 keeps Mira safe in the back row for consistent healing output, but reduces Mirage bleeding triggers since she takes less damage.
Mira is the Minutemen’s premier support hero who heals the lowest-HP ally through Battlefield Treatment while her Battledog provides offensive pressure and damage redirection through Field Defense. Her Mirage UW adds bleeding on damage taken, which synergizes with the faction’s status-effect chains by triggering First Aid’s stacking healing and DMG Mitigation bonuses. Battlefield Assistance simultaneously buffs the highest-ATK ally’s damage while debuffing the attacked enemy.
Pros & Cons
- Battlefield Treatment provides percentage-based healing that scales well into late game
- Mirage UW adds bleeding on damage taken, triggering faction-wide status synergies
- First Aid exclusive gear grants stacking healing and DMG Mitigation from teammates’ status effects
- Battlefield Assistance simultaneously buffs ally damage and debuffs enemy damage
- Healing can be completely shut down by anti-heal effects like Dylan’s Remorse
- Relatively low offensive contribution compared to dedicated damage dealers
- First Aid’s passive requires Minuteman teammates to apply status effects consistently
Skills
Command the battle dog to restore 15/17/19/21/25% of the max HP.
At the start of each round, command the battle dog to deal 25/30/35/40/50% WPN DMG to the enemy target who has the highest ATK power.
Cast "Battledog’s Attack" to let the battle dog protect the Hero of your side from 15/18/21/24/30% of the subsequent single-target DMG for one round.
Casting "Battlefield Treatment" restores 2.5/3/3.5/4/5% of the Hero’s max HP for two rounds.
Casting "Battledog’s Attack" increases 4/4.8/5.6/6.4/8% more DMG dealt by the next attack of the Hero who has the highest ATK on your side and reduces 4/4.8/5.6/6.4/8% DMG dealt from the attacked enemy target’s next attack.
Gear
First Aid is mandatory for Mira to unlock her full support potential, especially the stacking bonuses from Minuteman teammates’ status effects. Pair it with Heal for maximum healing output or Mental Control for added utility. Use Castle or Self-Healing when Mira is positioned in the front row and needs extra survivability.
Mira’s exclusive set providing 25% damage reduction to Vital Hormones targets and stacking healing/DMG Mitigation bonuses from Minuteman teammates’ status effects. Essential for her support role.
#1 Best


Support-oriented set that enhances Mira’s utility through crowd control effects, adding disruption to her healing and buffing toolkit.
#2


Direct healing enhancement set that boosts Battlefield Treatment’s restore amount, ideal for lineups that need maximum sustain.
#3


Provides personal survivability through self-healing effects, keeping Mira alive longer to continue supporting the team.
#4


Versatile set offering balanced stats, viable as a secondary set when First Aid is already equipped and Mira needs general stat improvements.
#5

Defensive set boosting HP and DEF for Mira’s front-line positioning, useful when she needs to absorb more damage in position 1 or 2.
#6

Mira’s substats focus entirely on survivability and healing scaling. HP% is the top priority across all slots since Battlefield Treatment heals based on max HP. Avoid offensive substats as Mira’s value comes from keeping teammates alive and triggering status synergies.
HP%, STR, DMG Mitigation
HP% scales Battlefield Treatment’s healing and Mira’s survivability, STR provides moderate offensive contribution, and DMG Mitigation helps her survive in front-line positions.
HP%, VIT, AGI
HP% and VIT build Mira’s HP pool for better healing and survivability, while AGI helps her heal allies before they take lethal damage.
DEF, VIT, DMG Mitigation
Full defensive substats ensure Mira survives in front-line positions where she needs to take damage to trigger Mirage bleeding.
HP%, Skill Effect Enhancement, VIT
HP% and VIT continue scaling her HP pool, while Skill Effect Enhancement boosts Battlefield Treatment’s healing and Battlefield Assistance’s buff/debuff values.
Recommended lineups
Archetype tags describe playstyle. Each card shows recommended gear (helmet icons), APC parts, and War Beast. Open APC · View details for part skills and calculator link.


Crimson Predator boosts team DPS to close fights quickly, with Mira’s healing ensuring the team survives long enough for Heytex and Benson to deliver lethal damage.
Primary tank absorbing burst damage and chaining it to enemies, relying on Mira’s healing to sustain through prolonged fights.
Secondary tank providing team-wide DMG Mitigation through Guardian of Justice, with Mira keeping his HP topped off to extend AC Shield’s effective duration.
AOE dealer whose Hellfire burning triggers Mira’s First Aid stacking bonuses, creating a healing feedback loop as more enemies burn.
Primary carry benefiting from Mira’s Battlefield Assistance damage buff while Blaze Shark procs off Benson’s burning for sustained AOE damage.
Dedicated healer keeping Ricardo and Bolton alive while First Aid stacks healing and DMG Mitigation bonuses from Benson’s burning. Battlefield Assistance buffs Heytex’s carry potential.
The premier Minutemen lineup where Mira provides critical healing sustain to keep the front-line tanks alive through prolonged burning chain fights. Mira occupies position 5 as the dedicated healer, with her First Aid gear stacking bonuses from Benson’s burning effects on enemies. Her Battlefield Assistance buffs Heytex’s carry damage while debuffing targets.

Metallic Dragon enhances team survivability with tank and sustain bonuses, synergizing with Mira’s healing and Buri’s damage distribution for maximum durability.
Primary tank whose Link of Life distributes damage to all allies, making Mira’s percentage-based healing extremely efficient since no single hero takes lethal burst.
Secondary tank adding DMG Mitigation that reduces the distributed damage from Buri’s Link of Life, easing the healing burden on Mira.
AOE dealer applying burning to fuel Heytex’s Blaze Shark while triggering Mira’s First Aid passive for stacking healing bonuses.
Primary carry converting Benson’s burning into Blaze Shark damage while benefiting from Mira’s Battlefield Assistance damage buff.
Core healer whose percentage-based healing perfectly counters Buri’s damage distribution. First Aid stacks bonuses from Benson’s burning for increasing healing output over time.
A sustain-focused lineup where Buri’s Link of Life distributes damage across all allies while Mira heals the distributed damage to keep everyone alive indefinitely. Mira sits in position 5 providing healing that synergizes with Buri’s damage distribution, making the entire team extremely difficult to kill. Benson and Heytex handle offensive duties through the burning chain.


Metallic Dragon provides tank and sustain bonuses that synergize with the Bolton-Mira front line, prioritizing team durability in this defensive lineup.
Primary tank whose AC Shield and DMG Mitigation stacking create an impenetrable front line. Mira’s healing keeps him at high HP to maximize Guardian of Justice’s team benefit.
Core support in the front line, taking damage to trigger Mirage bleeding while healing Bolton and buffing the highest-ATK ally through Battlefield Assistance.
AOE dealer applying burning that triggers Mira’s First Aid passive, creating stacking healing and DMG Mitigation bonuses throughout the fight.
Primary carry providing single-target burst damage from the safety of the back row, benefiting from Mira’s Battlefield Assistance damage buff.
Secondary damage dealer whose Kitten’s Daydream applies Ash on burning targets set up by Benson, adding another DOT layer for Mira’s First Aid triggers.
An early-season lineup where Mira is the core support, paired with Bolton as the primary tank for a durable front-line duo. Mira occupies position 2 as a front-line support, maximizing Mirage bleeding triggers while healing Bolton through sustained fights. Benson, Rebecca, and Kobayakawa provide damage from the back row.
Synergies
Mira’s Battlefield Treatment and Vital Hormones keep Bolton’s HP topped off, extending his AC Shield’s effective duration. The front-line duo provides both healing and mitigation for extreme durability.
Benson’s Hellfire burning triggers Mira’s First Aid 4-piece bonus, granting her stacking +15% healing and +7% DMG Mitigation. More Minuteman teammates applying statuses means faster stacking.
Mira’s Mirage UW causes bleeding when she takes damage, and Heytex’s Blaze Shark has a chance to fire bullets when enemies have status effects. Mira’s bleeding adds another status for Blaze Shark procs.
Ricardo’s chain-linking mechanic spreads damage, and Mira’s percentage-based healing efficiently counters spread damage since Battlefield Treatment targets the lowest-HP hero regardless of who takes the initial hit.
Ada’s United Prowess ability boosts healing effects for the team. Combined with Mira’s Battlefield Treatment and First Aid bonuses, healing output reaches extremely high levels.
Interactions with other heroes’ ultimate weapons.
Benson’s Hellfire UW stacks up to 10 additional burning layers and procs burning when heroes deal damage. Each burning proc from Benson triggers Mira’s First Aid stacking bonuses for increased healing and mitigation.
Mira’s Mirage UW causes bleeding when she takes damage. Heytex’s Blaze Shark fires bullets based on status effects on enemies, and Mira’s bleeding adds to the status count for more bullet procs.
Bolton’s AC Shield provides a massive 200% max HP shield at battle start. Combined with Mira’s healing, Bolton becomes nearly unkillable in the early rounds, buying time for the team’s damage to ramp up.
Ultimate weapons

Unlocked
When Mira takes damage, she has a 10% chance to immediately unleash her battledog for an attack. When attacking zombies, increases her HP cap by 10%.
★
When Mira takes damage, she has a 15% chance to immediately unleash her battledog for an attack. When attacking zombies, increases her HP cap by 15%.
★★
When Mira takes damage, she has a 15% chance to immediately cast the "Battledog’s Attack"; when she casts the "Battledog’s Attack", the target will enter a bleeding status and take 100% WPN DMG, lasting 2 round(s). When attacking zombies, increases her HP cap by 15%.
★★★
When Mira takes damage, she has a 17% chance to immediately cast the "Battledog’s Attack"; when she casts the "Battledog’s Attack", the target will enter a bleeding status and take 120% WPN DMG, lasting 2 round(s). When attacking zombies, increases her HP cap by 20%.
★★★★
When Mira takes damage, she has a 20% chance to immediately cast the "Battledog’s Attack"; when she casts the "Battledog’s Attack", the target will enter a bleeding status and take 140% WPN DMG, lasting 2 round(s). When attacking zombies, increases her HP cap by 25%.
★★★★★
When Mira takes damage, she has a 20% chance to immediately cast the "Battledog’s Attack"; when she casts the "Battledog’s Attack", the target will enter a bleeding status and take 160% WPN DMG, lasting 2 round(s). When attacking zombies, increases her HP cap by 40%.
Counters
- Casino (Hard Counter) — Casino’s focus drain prevents Mira from reaching Focus threshold for Battlefield Treatment, cutting off her primary healing and leaving the team without sustain.
- Dylan (Hard Counter) — Dylan’s Remorse UW reduces healing by 100% for 2 rounds. This completely shuts down Mira’s healing output, negating her entire role in the lineup.
- Burst Damage Lineups (Soft Counter) — Lineups that deal massive burst damage in early rounds can kill heroes before Mira’s percentage-based healing can recover the lost HP, bypassing her sustain advantage.
- Sustained Damage Lineups (Hard Counter) — Mira’s Battlefield Treatment heals the lowest-HP ally each round, making her team nearly impossible to grind down through sustained damage. Her healing outpaces gradual damage output.
- Single-Target Snipers (Soft Counter) — Mira’s Field Defense redirects 30% of single-target damage through her Battledog, reducing the effectiveness of heroes that focus on eliminating one target at a time.
Rating
A Tier. Mira is the go-to support for Minutemen lineups, providing healing, damage buff, enemy debuff, and status-effect synergy through a single hero slot. She is A-tier because her impact depends heavily on her teammates triggering First Aid’s passive bonuses.
Videos
Official: (none in data)
Unofficial:
Skins
None
Trivia
- Mira’s battle dog remains for the rest of the skirmish even if Mira is defeated by opponents, but takes no action without her commands.
- From the 1.332.001 update, she can be purchased in the Arena shop for 200 dog tags.