“Feel the power of Wildlings!”
Overview

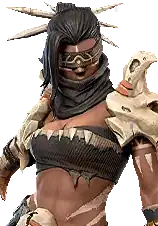
Ada
Wind Of The Wilderness
 Wildlings
Advanced Elite
Support
Tank
Wildlings
Advanced Elite
Support
Tank
1: Primary tank slot fills Ada’s focus bar fastest, letting Raging Roar fire early and often. Aid in Need triggers constantly from the front line, providing near-continuous reactive heals.
2: Preferred when a stronger primary tank (e.g. Buri) needs pos 1. Ada still absorbs enough damage to trigger Aid in Need frequently and fires Raging Roar on the normal focus cycle.
Ada is the premier sustain support of late Dimensions, applying the Reviving effect (per-round HP restoration + DMG Mitigation) to all teammates through her focus skill and reactively through Aid in Need whenever she absorbs damage. Her healing scales directly off her own max HP, meaning every point of VIT invested multiplies the value delivered to the entire team. With her God-Slaying Axe UW she also becomes a force multiplier on offense, granting all teammates +10% DMG and +10% DMG Mitigation for 2 rounds on every Raging Roar cast.
Pros & Cons
- Reviving heals the entire lineup passively every round — no other support provides team-wide sustained healing this consistently.
- Aid in Need applies reactive Reviving to the two lowest-HP teammates every time Ada takes 10% of her max HP as cumulative damage, creating a near-constant healing loop from the front line.
- United Prowess boosts all healing effects on the lineup by 20% (40% when Ada drops below 50% HP), amplifying every other heal source in the game.
- God-Slaying Axe UW grants all teammates +10% DMG and +10% DMG Mitigation for 2 rounds on each Raging Roar cast — a dual offensive and defensive team buff.
- Breeze exclusive gear applies Reviving to all teammates at battle start, providing healing even before the first focus skill fires.
- Synergises exceptionally with Buri: damage distribution from Link of Life causes all heroes to take small, constant hits, which triggers Aid in Need repeatedly for nonstop reactive heals.
- High AGI (894) gives her strong defensive targeting resistance and reduces damage taken.
- Gated behind Season X4 — unavailable to most players and irrelevant in early-game content.
- Reviving is a heal-over-time effect; does nothing against a single burst hit that one-shots a hero.
- Relatively low damage output (STR 594, ATK-focused skills deal only 80% WPN DMG); she holds a lineup slot that could be a second carry.
- Focus drain from Casino hard-counters her: delaying Raging Roar delays both the team-wide heal and the God-Slaying Axe DMG/Mitigation buff.
- Aid in Need threshold (10% cumulative damage) can fail to trigger if the enemy lineup deals infrequent but large single hits rather than many small ones.
Skills
Ada deals 48/55/60/68/80% WPN DMG to every enemy target individually and applies a Reviving effect to all teammates, who will restore some HP equal to 3/3.4/3.8/4.2/5% of Ada’s max HP each round, lasting 2 rounds and stackable for up to 2 layers. The REviving effect will also grant the targets 10% DMG Mitigation.
All teammates receive 10/12/14/16/20% more healing effect; the effect will be doubled when Ada has less than 50% HP left.
HP cap increases by 7.5/9/10.5/12/15%.
Each layer of the Reviving effect additionally restores 25/30/35/40/50 pts of Focus for the recipient.
Every time Ada takes cumulative DMG equal to 20/18/16/14/10% of her max HP, she will apply the Reviving effect to 2 teammates with the lowest HP percentage.
Gear
Breeze is non-negotiable best-in-slot. The second slot depends on her position: Super Core for pos 1 (tank role), Alpha Bless for pos 2 (support role, letting the primary tank hold Super Core). Heal is the strongest non-exclusive option for pure healing output, while Resolute provides survival insurance. Unlike DPS heroes, Ada gains no meaningful value from Apocalypse, Ripper, or other damage sets.
Exclusive set. The only gear in the game that applies Reviving to the entire team at battle start (2 layers at Master), providing +10% HP healing per round and +20% DMG Mitigation to all heroes before the first action is taken. Mandatory.
#1 Best


Best tank/support set for Ada in position 1. Accelerates focus bar fill across the lineup starting from pos 1, letting Raging Roar fire sooner for faster God-Slaying Axe buff activation. 4-piece also grants +10% DMG Mitigation and a round-start +5% DMG / +5% DMG Mitigation cycle.
#2


Adds team-wide round 1 shields (6.5% of Ada’s max HP to each hero at Master) and +8% Crit Immunity to the lineup. Pairs well with Breeze — both proc at battle start for a stacked defensive opening. Best choice for position 2 when Super Core belongs on another tank.
#3


4-piece +45% Healing and Shield effect directly amplifies Ada’s Reviving output and United Prowess. Every heal in the lineup becomes 45% stronger. Best choice when maximising healing throughput over raw survivability.
#4


At the start of each round restores HP equal to 35% of Ada’s ATK (doubled below 50% HP). Keeps Ada’s own HP topped up so Aid in Need continues to fire and United Prowess stays at the standard 20% bonus rather than the doubled 40% (which requires her to be low).
#5


Death immunity 4-piece ensures Ada survives a burst kill attempt. Without Ada the lineup loses its primary healer entirely; Resolute buys her one second chance. Best fallback if none of the above sets are available at sufficient quality.
#6

Ada’s entire kit scales with max HP. Every substat decision should prioritise HP% and VIT across all slots. Do not roll DMG Bonus, STR, INT, or Crit Rate on Ada — these provide near-zero value for a hero whose damage output is irrelevant.
HP%, VIT, DMG Mitigation
Ada is a support/tank — her weapon substat priority follows HP and defense, not DMG Bonus. HP% scales her Reviving heal output (5% of max HP per layer); VIT is the direct HP stat; DMG Mitigation keeps her alive longer to keep healing.
HP%, VIT, AGI
HP% remains top priority. AGI reduces incoming damage and protects against AGI-targeting skills (Kelly, Rebecca) that would otherwise bypass tanks to hit Ada.
DEF, VIT, DMG Mitigation
Pure defense. Higher DEF and DMG Mitigation reduce the damage Ada takes per hit, meaning Aid in Need triggers accumulate more slowly — keeping her healthier while still firing reactive heals regularly.
HP%, VIT, Skill Effect Enhancement
HP% and VIT compound the Reviving heal further. Skill Effect Enhancement increases the flat heal values and shield values from Raging Roar and Breeze.
Recommended lineups
Archetype tags describe playstyle. Each card shows recommended gear (helmet icons), APC parts, and War Beast. Open APC · View details for part skills and calculator link.


Sustain lineup built to survive through attrition. Metallic Dragon’s HP, DEF, DMG Mitigation, and Crit Immunity keep the entire team durable. Buri’s damage distribution makes team HP pool size critical — Metallic Dragon maximises it.
Primary tank. Link of Life distributes 50% of incoming damage across the lineup with +24% DMG Mitigation. Guardian STR UW casts Link of Life at battle start and grants one death immunity to any hero. Frosty Coffin UW adds +15% crit rate and +30% crit DMG while Link is active.
Core healer. Breeze applies 2 Reviving layers at battle start before any action. Alpha Bless adds team shields at round 1 and +8% Crit Immunity. Raging Roar heals all heroes and triggers God-Slaying Axe’s +10% DMG / +10% DMG Mitigation buff for 2 rounds. Aid in Need fires constantly thanks to Buri’s damage distribution.
Seed of Life places a time bomb on an enemy that heals Ada’s lineup when triggered. Corvine Curse reduces a random enemy’s all stats by 8% each round (stackable). Soul Split shares Eva’s INT/STR/AGI with the highest-stat teammates. Spirit exclusive gear lets Seed of Life target all back-row enemies.
Cursed Scythe reduces all enemy STR, INT, and AGI by 12% for 2 rounds on every cast. Soul Reaper boosts Elaine’s own stats by 100% of the stat loss she inflicts. Skeleton exclusive gear debuffs the three highest-stat enemies at battle start and makes the lowest-INT enemy take permanent +8% more damage.
Staunch Will shields all allies on every focus skill cast. Chimera Anchor UW triggers 50% TAC ATK damage to a random enemy each time a shield is applied (up to 5× per round). Guardian INT exclusive gear scales shields with rounds elapsed. Fifth Wildlings hero securing the +20% faction bonus.
The defining Wildlings sustain lineup. Buri’s Link of Life distributes 50% of all incoming damage evenly across the team — every hero takes a small, constant stream of hits each round. This is precisely the condition Ada’s Aid in Need is built for: each distributed hit counts toward her 10% HP threshold, triggering reactive Reviving heals on low-HP heroes almost every action. Ada heals back what Buri spreads; Buri prevents anyone from dying to a single burst. Eva and Elaine provide Wildlings DPS and debuffs while Harman’s shields layer on top of the Reviving. All 5 heroes are Wildlings for the maximum +20% ATK/HP faction bonus.


Triple-carry lineup with Heytex, Amum, and Victoria. Crimson Predator’s offensive stats maximise output across all three carries. Ada’s Reviving and Monica’s tanking provide sufficient survivability.
Primary tank. Resolute’s death immunity ensures Monica survives through full LumiShield charging cycles. Sword & Shield shields the lowest-HP teammate while charging and makes enemies take +30% DMG for 2 rounds after exiting. Ruby Shield UW gives 80% max HP shield turn 1. LumiShield counter-attacks have 50% Stun chance.
Core healer. Resolute ensures Ada survives burst attempts — losing the lineup’s only healer is catastrophic. Breeze applies Reviving to all teammates at battle start. God-Slaying Axe UW grants +10% DMG and +10% DMG Mitigation on Raging Roar. Aid in Need triggers constantly from pos 2 as Monica’s LumiShield absorbs and distributes damage.
AOE carry. Resolute’s death immunity protects his fragile 299 VIT. Marks 3 random enemies with Bullet Rain. Pinpoint Aim makes marked targets take +8% more damage, amplifying Victoria’s Lightsword and Amum’s Predator. Ada’s +10% DMG buff from God-Slaying Axe empowers all rocket hits.
Execute carry. Apocalypse’s crit rate and crit DMG synergise with Crimson Eye Claws UW’s scaling crit. Wolf Pack adds +80% WPN DMG to Predator and team-wide DMG stacking on kills. Ada’s Reviving keeps Amum healthy between kill chains, compounding with Bloodstained Claw’s 30% lost HP heal on kills.
Burst carry. Super Core accelerates focus bars across the lineup. Combat Master converts shield stacks into +25% DMG. Energy Detection copies shields from Monica’s Sword & Shield teammate shield. Ada’s God-Slaying Axe +10% DMG stacks with Thunder Blade UW’s +15% back-row DMG.
Top-tier X4-X6 meta lineup pairing Monica’s LumiShield tanking with Ada’s Reviving sustain in the front row, enabling three back-row carries to deal uncontested damage. Heytex marks random enemies with Bullet Rain and triggers Pursue procs, Amum executes low-HP targets with Predator’s kill chain, and Victoria converts shield accumulation into devastating Lightsword burst. Ada is the sustain anchor whose Reviving heals all three carries passively every round while God-Slaying Axe UW grants +10% DMG to the entire team, making this one of the strongest lineups in the X4-X6 meta.
Dual DPS carry lineup. Crimson Predator’s ATK, DMG Bonus, and Crit Rate benefit both Heytex and Victoria. Ada’s sustain makes survivability less critical here, freeing the beast slot for pure offense.
Primary support anchor. Super Core in pos 1 feeds focus across the lineup. Breeze starts Reviving on all heroes immediately. God-Slaying Axe’s +10% DMG buff on Raging Roar empowers both Victoria and Heytex simultaneously.
Staunch Will shields all allies every cast. Chimera Anchor UW deals chip damage per shield event. Alpha Bless provides team-wide Crit Immunity and round 1 shields that feed Victoria’s Energy Detection. Guardian INT scales shield size with rounds elapsed.
Third Wildlings for +10% faction bonus with Ada and Harman. Seed of Life softens targets. Corvine Curse reduces enemy stats each round. Soul Split boosts teammates’ top stats, helping Victoria’s INT scale further.
AOE carry. Ada’s Reviving +10% DMG Mitigation on all heroes reduces the damage Heytex takes from return fire, keeping him alive for more Pursue procs. God-Slaying Axe +10% DMG buffs all his rocket hits.
Primary single-target carry. Energy Detection copies shields from Harman and Alpha Bless onto herself. Lightsword adds 250% of her shield as damage. God-Slaying Axe +10% DMG from Ada stacks on top of Thunder Blade UW’s +15% back-row DMG.
Ada as a cross-faction sustain anchor for a dual-carry lineup. Victoria’s Lightsword damage scales with her accumulated shield value; Ada’s Reviving keeps Victoria alive and her God- Slaying Axe UW boosts all teammates’ DMG by 10%, directly amplifying Victoria’s burst damage. Harman layers shields on top of Ada’s heals. Eva brings Wildlings faction synergy and Corvine Curse stat debuffs. This lineup sacrifices the full Wildlings faction bonus (only 3 heroes) for the raw power of Victoria and Heytex as dual carries.
Amum is an aggressive kill-chain carry. Crimson Predator’s WPN ATK, DMG Bonus, and Crit Rate feed directly into Amum’s snowball. Ada’s sustain makes survivability less of a concern here.
Primary tank and damage distributor. Guardian STR UW casts Link of Life at battle start. Frosty Coffin grants Amum +15% crit rate and +30% crit DMG while Link is active, directly boosting kill potential. Buri’s Inurn restores 250 Focus whenever any hero dies.
Core healer. Super Core in pos 2 feeds focus to Buri and Ada first, letting Raging Roar activate quickly for the God-Slaying Axe DMG buff that further accelerates Amum’s kills. Aid in Need provides constant reactive heals as Buri distributes damage.
Seed of Life softens priority targets for Amum. Corvine Curse reduces enemy stats each round, making them easier to kill below 50% HP thresholds. Nirvana UW reduces the highest enemy INT/STR/AGI/LUK by 15% alternating rounds, weakening the enemy’s best heroes.
Primary carry. Always targets the lowest-HP enemy. Bloodthirsty Being adds up to 2.5% DMG per 5% enemy HP lost, snowballing as targets weaken. On kill, heals 30% of lost HP and launches a bonus focus skill at 60% damage. Crimson Eye Claws UW adds 0.5% crit rate and 0.5% crit DMG per 1% HP lost, plus death immunity on first fatal hit.
Shields all allies. Alpha Bless provides team Crit Immunity and round 1 shields. Chimera Anchor UW deals chip damage to random enemies each time a shield is applied, funnelling targets toward the HP thresholds Amum needs to activate his kill bonuses. Fifth Wildlings hero securing +20% faction bonus.
Once Amum arrives at X6, the Wildlings sustain core gains a devastating snowball finisher. Amum targets the lowest-HP enemy, heals 30% of his lost HP on every kill, and deals up to 2.5% more damage per 5% of the target’s missing HP. Ada’s persistent Reviving keeps the whole team healthy, ensuring Amum is never at risk while hunting. Every kill Amum makes triggers his bonus attack (if it was a focus skill kill) and restores Focus for Buri via Inurn, feeding the damage distribution cycle. All 5 Wildlings remain for the +20% faction bonus.
Synergies
Buri’s Link of Life distributes 50% of incoming damage evenly across all linked heroes. Every distributed hit chips away at each hero’s HP in small amounts — precisely the condition Ada’s Aid in Need is optimised for. Her 10% max HP threshold triggers almost every action cycle, delivering Reviving heals to the two lowest-HP heroes in near-continuous loops. Both are Wildlings, contributing to the faction bonus.
Eva’s Seed of Life restores HP equal to the TAC DMG it deals when it detonates. Ada’s United Prowess boosts all healing effects on the lineup by 20% (40% when Ada is below 50% HP), amplifying Eva’s burst heal. Both are Wildlings supporting a full faction bonus.
Harman’s Staunch Will shields all allies; Ada’s Reviving heals all allies. Together they create a double-layer sustain system — shields absorb burst damage while Reviving patches the HP that leaks through. Both are Wildlings, and Ada’s United Prowess amplifies Harman’s shield healing.
Elaine’s Cursed Scythe reduces enemy STR, INT, and AGI by 12% per cast. The lineup needs to survive long enough for debuffs to stack — Ada provides exactly that sustain. Elaine’s Soul Reaper also boosts her own stats by the amount enemies lose, making her progressively stronger while Ada keeps her alive to keep casting.
Amum heals 30% of his lost HP on every kill and deals more damage the lower the target’s HP is. Ada’s Reviving ensures Amum stays healthy between kills, allowing him to enter each fight near full HP rather than trading down. The sustained chip damage from Reviving mitigation also makes it harder for enemies to burst down Amum before he can execute.
Ada’s God-Slaying Axe UW gives all teammates +10% DMG for 2 rounds on each Raging Roar cast. This stacks with Victoria’s Thunder Blade +15% back-row DMG and Lightsword’s shield-scaling burst. Ada also keeps Victoria alive through Reviving, ensuring her shield HP pool never drops to zero from sustained hits before she can attack.
Titan’s Universal Redemption takes 15% of any teammate’s incoming damage, concentrating hits on himself. This creates a high-frequency hit pattern on Titan that continuously triggers Ada’s Aid in Need, applying Reviving heals to the two lowest-HP heroes. Titan’s Eternality skill also boosts healing and shield effects by 20%, stacking with Ada’s United Prowess.
Interactions with other heroes’ ultimate weapons.
While Link of Life is active, all allies gain +15% crit rate and +30% crit DMG. Ada’s sustained Reviving heals keep every hero’s HP topped up through the distributed damage, sustaining Link of Life for as many rounds as possible and maximising Frosty Coffin’s window.
Every time a teammate gains a shield, Harman deals 50% TAC ATK damage to a random enemy (up to 5× per round). Ada’s Breeze gear applies Reviving at battle start (which also adds a healing layer), and Alpha Bless adds round 1 shields. The more shield events the lineup generates, the more Chimera Anchor chip damage accumulates.
When a Cursed enemy dies, all teammates gain a shield equal to 20% of Elaine’s max HP. Ada’s Reviving healing keeps heroes alive long enough for Elaine’s Cursed Scythe to stack, ensuring kills happen on cursed targets to trigger the team shields. United Prowess also increases the effective value of those shields by 20%.
Scarlet Authority makes the entire lineup deal 10% more DMG and receive 10% more healing and shield effects. The +10% healing effect directly amplifies Ada’s Reviving output, stacking with United Prowess for a combined healing bonus of up to 50%+ on top of base Reviving values.
Necromancy Beads grant Titan immunity to his first fatal hit and restore 40% of his max HP. Titan’s Universal Redemption causes him to tank damage for teammates, so he frequently reaches low HP. Ada’s Aid in Need reactively heals him as he drains, and the death immunity from Necromancy Beads ensures he survives the burst that Aid in Need couldn’t fully prevent.
Self-synergy: when Ada takes 70% cumulative max HP damage (likely in a prolonged front-line fight), she triggers Super Revival — restoring 50% max HP and 500 Focus at the end of the round. This allows one additional Raging Roar cast sooner, reapplying Reviving and triggering the God-Slaying Axe +10% DMG / +10% DMG Mitigation buff for the whole team again.
Ultimate weapons

- Ultimate Weapon’s Energy 6,700
- TAC DEF 25%
- WPN DEF 25%
- HP 80%
Unlocked
Focus skill increases all teammates’ DMG by 5% and DMG Mitigation by 5%, lasting 2 round(s).
★
Focus skill increases all teammates’ DMG by 6% and DMG Mitigation by 6%, lasting 2 round(s).
★★
Focus skill increases all teammates’ DMG by 7% and DMG Mitigation by 7%, lasting 2 round(s). When the hero takes cumulative DMG equal to 80% of her max HP, applies to the hero herself a Super Revival effect, restoring some HP equal to 35% of the max HP and 350 points of Focus at the end of the round (can be triggered up to 1 times in each battle).
★★★
Focus skill increases all teammates’ DMG by 8% and DMG Mitigation by 8%, lasting 2 round(s). When the hero takes cumulative DMG equal to 80% of her max HP, applies to the hero herself a Super Revival effect, restoring some HP equal to 40% of the max HP and 400 points of Focus at the end of the round (can be triggered up to 1 times in each battle).
★★★★
Focus skill increases all teammates’ DMG by 9% and DMG Mitigation by 9%, lasting 2 round(s). When the hero takes cumulative DMG equal to 70% of her max HP, applies to the hero herself a Super Revival effect, restoring some HP equal to 45% of the max HP and 450 points of Focus at the end of the round (can be triggered up to 1 times in each battle).
★★★★★
Focus skill increases all teammates’ DMG by 10% and DMG Mitigation by 10%, lasting 2 round(s). When the hero takes cumulative DMG equal to 70% of her max HP, applies to the hero herself a Super Revival effect, restoring some HP equal to 50% of the max HP and 500 points of Focus at the end of the round (can be triggered up to 1 times in each battle).
Counters
- Casino (Hard Counter) — Casino’s Double Down drains 200 Focus from all enemies on skill cast and can force Ada to attack only Casino via Try the Luck. This delays Raging Roar significantly, postponing both the team-wide Reviving heal and the God-Slaying Axe DMG buff. Without her focus skill, Ada only provides Aid in Need reactive heals — strong but insufficient alone.
- Burst damage lineups (Soft Counter) — Reviving is a heal-over-time effect — it cannot prevent a one-shot. Lineups that stack high burst damage (Blanche + Galande + Amum) can delete a backrow carry before Reviving patches the HP. Ada’s Aid in Need must trigger in time to matter.
- Heytex 103 (Soft Counter) — Heytex’s random targeting can hit Ada directly from round 1 regardless of her position. His many small rocket hits rapidly fill Ada’s Aid in Need threshold (which is a benefit in some ways) but also threaten to kill her before her focus bar fills if she is already below 50% HP.
- Sustain-starved lineups (Hard Counter) — Lineups with no healer or shield generator are slowly ground down by the combination of Ada’s Reviving (per-round HP restore), Eva’s Seed of Life, and Harman’s shields. The longer the fight goes, the more Ada’s lineup pulls ahead through accumulated HP advantage.
- Chip damage / multi-hit lineups (Soft Counter) — Many small hits (Heytex rockets, Harman Chimera Anchor procs, Penny drones) each count toward Ada’s Aid in Need threshold. These lineups inadvertently trigger Ada’s reactive heals constantly, keeping her team healthy while their own heroes have no equivalent sustain.
- Single-target snipers (Situational Counter) — With two layers of Reviving active, all heroes have +20% DMG Mitigation on top of their gear stats. Kelly, Rebecca, and Galande deal less effective damage per hit than they would against a lineup without Reviving, giving Ada’s carries more time to eliminate threats.
Rating
S Tier. Ada is an S-tier hero — the best pure support in the game once unlocked. Her Reviving mechanic is uniquely durable — it heals the whole team passively every round, stacks twice, and is reapplied reactively as she tanks hits. The God-Slaying Axe UW elevates her from a pure healer into a team-wide damage amplifier. Although she is gated behind Season X4, her unmatched sustain and team-wide utility make her a mandatory S-tier pick for any player who has reached that stage.
Videos
Official: (none in data)
Unofficial:
Skins
None
Trivia
None