“Your health has been detected, and the extermination process has been initiated”
Overview

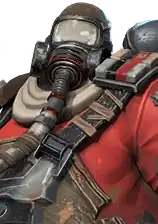
Heytex 103
Anti-War Activist
 Minutemen
Advanced Elite
AOE Damage
Support
Minutemen
Advanced Elite
AOE Damage
Support
4: Standard carry slot; fires after debuffers in pos 1-3 so marks land on softened targets.
5: Works if another damage dealer needs pos 4; still back-row, still safe.
3: Fires earlier in the Super Core cycle; useful when you want marks applied before other back-row heroes act.
Heytex 103 is the defining AOE carry of the S5+ meta, randomly marking 3 enemies and bombarding them with rockets that bypass front-row tank protection entirely. His Pursue skill turns every teammate’s attack on a marked target into bonus damage, making him a force multiplier for the whole lineup. His Blaze Shark ultimate weapon further amplifies this by shooting extra bullets whenever Minutemen allies inflict status effects, cementing him as the core of burn/bleed AOE compositions.
Pros & Cons
- Random targeting bypasses front-row tanks entirely — no position is safe.
- Marking mechanic amplifies the entire team’s damage via Pursue (each teammate hit on a marked target triggers a bonus bullet).
- Strong self-sustain through Rapid Fix (restores up to 30% of damage taken each round).
- Blaze Shark UW creates a devastating feedback loop with Minutemen status effects (burning, bleeding, poisoned).
- High base INT (894) ensures strong TAC damage scaling.
- Marks last 3 rounds, providing sustained pressure even if Heytex is disabled for a turn.
- Random targeting means no control over which 3 enemies get marked — can waste marks on near-dead targets.
- Fragile (lowest VIT tier at 299) — dies fast if targeted by Kelly, Rebecca, or backrow snipers.
- Needs focus bar to fill before Bullet Rain activates; vulnerable to Casino’s focus drain (Double Down).
- Highly dependent on Minutemen teammates for Blaze Shark UW value — weaker in mixed-faction lineups.
- Reduced effectiveness against lineups with strong AOE cleanse or high DMG mitigation that neutralize marks and statuses.
Skills
Randomly select 3 enemy targets to mark, and launch a total of 12/12/15/15/20 rockets at the marked targets, causing 20/23/26/29/35% of tactical damage each time. The markings last for 3 rounds.
At the end of each round. restore the Hero’s HP equal to 15/18/21/24/30% of DMG the Hero receives this round.
Increase the damage of the marked target by 4/4.8/5.6/6.4/8%.
Casting "Bullet Rain" launches additional 4/5/6/7/8 rocket(s).
When the marked target is attacked. shoot a bullet at the target. dealing DMG equal to 125/150/175/200/250% of the DMG caused by Bullet Rain" (10 bullets can be launched per round at most).
Gear
War Ender is best-in-slot but requires significant investment as an exclusive set. Resolute is the go-to second choice for most DPS heroes including Heytex — the survivability it provides keeps him alive long enough to deal damage, and the death immunity is a crucial safety net for his fragile stat line. Apocalypse is competitive in crit-focused Buri lineups. Hurricane is only relevant in early game (S0-S3) before better options are unlocked.
Exclusive set. +15% ATK baseline; killing an enemy grants +35% DMG to Heytex and +15% DMG to teammates (2 stacks max). Snowball potential is unmatched.
#1 Best


The standard DPS survivability set. +0.4% ATK per 1% HP lost means Heytex deals more damage the more he’s hit — his Rapid Fix self-heal works against this but the synergy between trading HP and dealing damage is excellent. The 4-piece death immunity with 30% HP restore and +50% DMG on the next attack is a crucial safety net for a fragile hero.
#2

+15% Crit Rate and +30% Crit Damage. Strong when paired with Buri’s Frosty Coffin UW (+15% crit rate, +30% crit DMG on Link of Life), turning Heytex’s high volume of rocket hits into frequent crits.
#3


Normal attacks cause bleeding, which triggers Blaze Shark UW bullets. Creates a self-sustaining status loop even without teammates proccing statuses.
#4


+10% ATK and +35% DMG after defeating target. Pairs well with War Ender’s kill-based snowball but standalone is less consistent.
#5

Early game option (relevant through S3). +8% TAC DMG Bonus and +24% Focus DMG are straightforward damage boosts, but Resolute and Apocalypse outclass it once available.
#6


Heytex is an INT damage dealer with low survivability. Prioritize INT and damage stats on weapon and jewelry (offensive slots), and HP/DEF/VIT on helmet and body (defensive slots). Unlike STR heroes, Heytex does not benefit from WPN ATK or STR substats at all — always pick INT variants.
DMG Bonus, INT, Crit Rate
DMG Bonus is the top priority as a universal multiplier for all damage sources; INT scales TAC ATK; Crit Rate for burst.
HP%, AGI, VIT
Survivability stats. HP% is the most efficient, AGI reduces incoming damage and protects against AGI-targeting skills.
DEF, VIT, DMG Mitigation
Pure defense. Keeps Heytex alive long enough for Bullet Rain to fire and marks to accumulate value.
DMG Bonus, INT, Skill Effect Enhancement
DMG Bonus is the top priority as a universal multiplier; INT for damage scaling; Skill Effect Enhancement directly boosts Bullet Rain and Pursue multipliers.
Recommended lineups
Archetype tags describe playstyle. Each card shows recommended gear (helmet icons), APC parts, and War Beast. Open APC · View details for part skills and calculator link.


Offensive lineup benefits from Crimson Predator’s WPN/TAC ATK, DMG Bonus, and Crit Rate. Metallic Dragon is a viable alternative if survivability is a concern.
Chains 3 enemies on skill, spreading all subsequent damage. Super Core accelerates his focus bar from pos 1. Grand Debut UW chains 2 enemies at battle start.
AC Shield UW provides a massive 200% max HP shield at battle start. Alpha Bless grants team-wide shields in round 1 (feeding Victoria if present) and crit immunity. Minutemen faction member.
Hellfire burns all enemies, triggering Heytex’s Blaze Shark bullets. Hellfire UW lets burning stack up to 15 layers. +8% DMG bonus for all Minutemen.
Core carry. Marks 3 random enemies with Bullet Rain; Pursue fires bonus bullets whenever teammates hit marked targets. Blaze Shark procs off Benson’s burns and Mira’s bleeds.
Battlefield Treatment heals front line. Mirage UW causes bleeding on Battledog’s Attack, triggering Blaze Shark. Battlefield Assistance buffs highest-ATK ally’s next attack.
The original Heytex meta lineup. Ricardo chains enemies in round 1 so shared damage spreads Heytex’s mark damage. Benson sets everything on fire, triggering Blaze Shark bullets. Mira provides healing, bleeding via Mirage UW, and a DMG buff to the highest-ATK ally (usually Heytex). Bolton holds the front line with AC Shield. This lineup defined S5 and remains strong into early Dimensions.

Offensive lineup with 3 damage dealers. Crimson Predator’s offensive stats maximize team output.
Primary tank. Super Core feeds focus to the team starting from pos 1. Alpha Bless adds team-wide round 1 shields and crit immunity — both sets ideal on the primary tank.
Mental Control redirects 80% of enemy normal attacks to Mira, protecting backrow. Mirage UW bleeding triggers Blaze Shark. Battlefield Assistance buffs highest-ATK ally.
Burns all enemies. Hellfire UW allows 15 burn stacks. +8% DMG for all Minutemen (all 5 heroes benefit).
Core carry. Full Minutemen lineup means Benson’s +8% DMG, faction +20% ATK/HP, and maximum Blaze Shark procs from all four Minutemen teammates.
Snipes lowest-AGI enemy (usually backrow carries). 220% TAC DMG focus skill. Minutemen member contributing to 5-hero faction bonus.
Pure Minutemen lineup for maximum faction bonus (+20% TAC/WPN ATK and HP with 5 same-faction heroes). Bolton and Mira anchor the front, Benson provides burns and faction DMG bonus, Rebecca snipes the lowest-AGI target while Heytex marks and bombards. Strong and simple to build — all heroes are obtainable without heavy spending. Falls off in late Dimensions when cross-faction synergies outperform raw faction bonuses.


Dual-carry lineup wants maximum offensive stats. Crimson Predator’s ATK, DMG Bonus, and Crit Rate benefit both Heytex and Victoria.
AC Shield UW gives 200% max HP shield at battle start, immediately charging Victoria’s Energy Detection. Super Core accelerates focus from pos 1. Alpha Bless provides team-wide shields in round 1.
Staunch Will shields all allies every skill cast. Chimera Anchor UW deals 50% TAC ATK to a random enemy each time a teammate gains a shield (up to 5x/round). Bolton already covers Alpha Bless; Resolute gives Harman death immunity to keep shields flowing.
Burns all enemies, triggering Blaze Shark. Minutemen faction bonus with Bolton and Heytex (+10% ATK/HP at 3 Minutemen). +8% DMG for Minutemen.
Marks 3 targets. Pinpoint Aim makes marked targets take +8% more damage, amplifying Victoria’s hits. Blaze Shark procs off Benson’s burns for extra bullets.
Energy Detection copies 50% of every shield applied to allies onto herself. Lightsword adds 250% of her shield as damage to Unsheathed Blade. Thunder Blade UW gives +200 focus, +15% DMG (back row), +15% DMG mitigation (front row).
Combines Heytex’s mark-based AOE with Victoria’s shield-scaling burst damage. Harman and Bolton generate shields for the entire team every round, which Victoria converts into massive single-target hits via Lightsword (+250% of shield value as damage). Heytex’s marks increase damage taken by marked targets (Pinpoint Aim), amplifying Victoria’s already huge hits. Penny provides additional shields and drone-based utility. This is the premier dual-carry lineup from S5 through Dimensions.

Buri lineups prioritize survivability. Metallic Dragon’s HP, DEF, DMG Mitigation, and Crit Immunity keep the damage-sharing pool healthy. Crimson Predator is viable if the lineup is already well-geared.
Link of Life distributes 50% of incoming damage across all linked heroes with +24% DMG mitigation. Guardian STR UW casts Link of Life at battle start and prevents one fatal hit on any hero. Frosty Coffin grants team crit bonuses.
AC Shield provides battle-start durability. Super Core accelerates team focus. Alpha Bless adds team-wide shields and crit immunity. Minutemen faction with Benson and Heytex.
Burns all enemies for Blaze Shark procs. Minutemen DMG bonus. Hellfire UW for burn stacking.
Primary carry. Buri’s damage distribution keeps him alive much longer. Frosty Coffin crit bonuses make his many rocket hits crit frequently. Blaze Shark feeds off Benson’s burns.
Heals the front line (critical with Buri spreading damage). Mirage UW bleeding triggers Blaze Shark. Battlefield Assistance buffs Heytex’s next attack.
Buri’s Link of Life redistributes damage across all heroes, dramatically improving survivability against burst damage and single-target snipers. This lets Heytex survive longer and accumulate more Pursue procs over extended fights. Buri’s Frosty Coffin UW grants +15% crit rate and +30% crit damage while Link of Life is active, turning Heytex’s many rocket hits into frequent crits. The premier Heytex lineup in Dimensions.


Triple-carry lineup. Crimson Predator’s WPN/TAC ATK, DMG Bonus, and Crit Rate maximise output across Heytex, Amum, and Victoria. Monica and Ada provide sufficient survivability.
Primary tank. Resolute’s death immunity ensures Monica survives through full LumiShield charging cycles. Sword & Shield shields the lowest-HP teammate while charging and makes enemies take +30% DMG after exiting, amplifying Heytex’s rockets on debuffed targets. Ruby Shield UW gives 80% max HP shield turn 1.
Core healer. Resolute provides death immunity for the team’s sustain anchor. Breeze applies Reviving at battle start. God-Slaying Axe UW grants +10% DMG and +10% DMG Mitigation on Raging Roar, amplifying every Heytex rocket and Pursue proc.
Primary AOE carry. Resolute’s death immunity is essential for Heytex’s fragile 299 VIT — losing him early removes all mark pressure and Pursue procs. War Ender snowballs on kills with +35% DMG to Heytex and +15% DMG to teammates. Bullet Rain marks 3 random enemies. Pinpoint Aim makes marked targets take +8% more damage, amplifying Amum and Victoria hits.
Execute carry. Targets the lowest-HP enemy — often a target already weakened by Heytex’s rockets. Apocalypse’s crit stats synergise with Crimson Eye Claws UW. Wolf Pack adds +80% WPN DMG to Predator. Each Amum kill triggers Wolf Pack’s +20% team DMG stacking, further boosting Heytex’s subsequent Pursue procs.
Burst carry. Super Core accelerates focus bars for the entire lineup. Heytex’s Pinpoint Aim makes marked targets take +8% more damage, amplifying Victoria’s Lightsword. Combat Master converts shield stacks into +25% DMG. Thunder Blade UW grants +200 Focus and +15% DMG in back row.
Top-tier X4-X6 meta lineup pairing Monica’s LumiShield tanking with Ada’s Reviving sustain in the front row, enabling three back-row carries to deal uncontested damage. Heytex marks random enemies with Bullet Rain and Pursue fires bonus bullets whenever teammates hit marked targets. Amum executes low-HP targets weakened by Heytex’s AOE, and Victoria’s Lightsword burst finishes priority targets. Ada’s God-Slaying Axe UW grants +10% DMG to all heroes, directly amplifying every rocket hit. Despite no faction bonus, raw hero synergy makes this one of the strongest X4-X6 lineups.
Synergies
Benson’s Hellfire burns all enemies every skill cast. With Hellfire UW, burning stacks up to 15 layers. Each burn application from Benson (a Minuteman) has a 30% chance to trigger Heytex’s Blaze Shark bullet. Benson also grants +8% DMG to all Minutemen via Nirvana.
Ricardo’s Chain of Pain links 3 enemies so damage to one spreads to others. When Heytex’s rockets hit a chained target, 20% of that damage conducts to chained partners. Grand Debut UW chains 2 enemies at battle start before skills even fire.
Heytex’s Pinpoint Aim makes marked targets take +8% more damage, amplifying Victoria’s massive Lightsword hits. They complement each other as dual carries — Heytex provides sustained AOE pressure while Victoria delivers single-target burst.
Mira’s Mirage UW causes bleeding on Battledog’s Attack, triggering Blaze Shark bullets. Battlefield Assistance buffs the highest-ATK ally’s next attack (often Heytex). Mira also keeps the front line alive so Heytex has time to deal damage.
Harman’s Staunch Will shields all allies every skill cast. In Victoria lineups, this feeds Victoria’s Energy Detection. Chimera Anchor UW deals damage to a random enemy each time a shield is applied (up to 5x/round), adding chip damage that procs Pursue on marked targets.
Bolton’s AC Shield UW (200% max HP shield at battle start) is the most durable opening in the game. As a Minuteman, he contributes to faction bonuses with Heytex and Benson. Guardian of Justice gives +5% DMG mitigation to all allies.
Buri’s Link of Life spreads 50% of incoming damage across all heroes, preventing Heytex from being burst down. Frosty Coffin UW grants +15% crit rate and +30% crit damage while Link is active, making Heytex’s many rocket hits crit far more often.
Interactions with other heroes’ ultimate weapons.
Hellfire UW lets burning stack up to 15 layers. After heroes deal damage to enemies, they apply Burning (up to 5 procs/round). Each Burning application by a Minuteman triggers Heytex’s Blaze Shark UW (30% chance per proc, up to 5 bullets/round). Creates a self-sustaining burn loop.
When Mira takes damage, 20% chance to cast Battledog’s Attack, which inflicts Bleeding (160% WPN DMG for 2 rounds). Bleeding is a Minuteman-applied status that triggers Blaze Shark bullets. Mira being hit in the front row means frequent procs.
Chains 2 random enemies at battle start before any skills fire. Heroes attacking chained enemies get +20% crit rate. When Heytex’s rockets hit a chained target, damage conducts to partners, effectively increasing Bullet Rain’s reach beyond the 3 marked targets.
While Link of Life is active, all allies gain +15% crit rate and +30% crit damage. Heytex launches 20-28 rockets per Bullet Rain plus up to 10 Pursue bullets per round — with this many individual hits, even moderate crit rate translates to frequent critical hits.
Every time a teammate gains a shield, Harman deals 50% TAC ATK damage to a random enemy (up to 5x/round). If that enemy is marked by Heytex, the hit triggers a Pursue bullet. In shield-heavy lineups (Alpha Bless, Bolton, Penny), this generates significant bonus damage on marked targets.
When Minutemen teammates apply poisoned/bleeding/burning to enemies, 40% chance to apply Ash effect. Heytex’s Blaze Shark bullets (triggered by those same statuses) add more hits to marked targets, and Kobayakawa’s Ash creates additional status interactions.
Thunder Blade gives Victoria +200 Focus at battle start and after Focus Skills, plus +15% DMG in the back row. Victoria’s Melt Armor makes attacked enemies take +18% more damage for 2 rounds. When both carries focus the same marked target, the damage stacking is devastating.
Penny’s drones clear Poisoned/Burning/Bleeding from allies (+20% DMG mitigation to the healed hero) and make drone-hit enemies take +20% more damage for 2 rounds. The +20% damage taken debuff stacks with Heytex’s Pinpoint Aim (+8%) on marked targets.
Ultimate weapons

- Ultimate Weapon’s Energy 6,700
- TAC ATK 25%
- INT 25%
- HP 80%
Unlocked
Increase damage to Bleeding targets by 10%.
★
Increase damage to Bleeding targets by 15%.
★★
Increase damage to Bleeding targets by 15%. When Minutemen teammates cause the enemy to enter a Poisoned, Bleeding or Burning status, 15% chance to shoot a bullet at target, dealing some DMG equal to 40% ATK (up to 5 bullets can be shot each round).
★★★
Increase damage to Bleeding targets by 20%. When Minutemen teammates cause the enemy to enter a Poisoned, Bleeding or Burning status, 20% chance to shoot a bullet at target, dealing some DMG equal to 45% ATK (up to 5 bullets can be shot each round).
★★★★
Increase damage to Bleeding targets by 25%. When Minutemen teammates cause the enemy to enter a Poisoned, Bleeding or Burning status, 25% chance to shoot a bullet at target, dealing some DMG equal to 50% ATK (up to 5 bullets can be shot each round).
★★★★★
Increase damage to Bleeding targets by 25%. When Minutemen teammates cause the enemy to enter a Poisoned, Bleeding or Burning status, 30% chance to shoot a bullet at target, dealing some DMG equal to 60% ATK (up to 5 bullets can be shot each round).
Counters
- Casino (Hard Counter) — Casino’s Double Down drains 200 Focus from all enemies on skill cast. This directly prevents Heytex from filling his focus bar and casting Bullet Rain. Casino’s Try the Luck can also force Heytex to only normal-attack Casino, wasting his turn entirely.
- Kelly (Soft Counter) — Kelly’s Hunting targets the enemy with the lowest AGI. Heytex has mediocre AGI (594) and is often one of the lower-AGI heroes in a lineup. Spine Whip UW gives Kelly a 50-100% chance for a second action each round, potentially killing Heytex before Bullet Rain fires.
- Galande (Soft Counter) — Galande targets the lowest-HP enemy with massive single-target damage (300% WPN DMG + 100% bonus). Heytex’s low VIT (299) makes him one of the squishiest targets. If marks haven’t fired yet, losing Heytex early is devastating.
- Blanche (Soft Counter) — Blanche’s Eradicate deals 260% + 100% WPN DMG to a random backrow enemy. Heytex sitting in pos 4 backrow is a prime target. Midnight Poodle UW restores Focus on crit kills, letting Blanche chain eliminations.
- Backrow-heavy lineups (Hard Counter) — Heytex’s random targeting ignores position entirely. Lineups that stack damage dealers in the back row (pos 3-5) hoping tanks will protect them are especially vulnerable — marks can land on fragile carries regardless of tank presence.
- Low-HP finisher lineups (Soft Counter) — Pursue triggers whenever ANY teammate attacks a marked target. Against lineups with heroes at reduced HP (from Resolute procs, self-damage skills, etc.), the bonus Pursue bullets accelerate kills dramatically.
- Victoria (shield-dependent) (Situational Counter) — While Victoria is a synergy partner, opposing Victoria lineups that depend on shields are vulnerable to Heytex’s sustained multi-hit damage. Many small rocket hits strip shields faster than a few large hits would, reducing Victoria’s Lightsword bonus damage.
Rating
S Tier. Meta-defining from Season 5 onward. Heytex introduced the random-targeting AOE paradigm that made no position safe, fundamentally shifting the game away from backrow-sniper comps. Remains a top-tier carry through Dimensions thanks to Blaze Shark synergies with Minutemen status heroes. Every competitive player either runs Heytex or builds specifically to counter him.
Videos
Official: (none in data)
Unofficial:
Skins

Purchasing and equipping Heytex 103’s skin grants a new look and grants buff – TAC ATK +5%.
Trivia
- Heytex is the 103rd health monitoring robot, hence the name Heytex 103. It was originally a robot for health checks, to see whether the scanned individual was healthy or not, and whether they were infected with the zombie virus or not. Its AI system gave it a mild and adorable "personality." Yet, a machine gun was equipped to its arm later, allowing it to eliminate mutants immediately and protect surrounding humans. Unfortunately, in the course of a mission, Heytex 103 was severely damaged. The Minutemen took it in and installed maintenance and grenade systems on it. Heytex 103 thus became a combat robot.
- Heytex 103 can be purchased in the Summit Arena shop with 26,400 S.A. medals (Summit Arena medals) since Season 5.